Mold growing in your home's insulation is a common problem that many homeowners face, often without even knowing it exists. This hidden threat can develop quickly when the right conditions are present, creating health risks and reducing your insulation's ability to keep your home comfortable.
The main causes of mold growth in insulation include moisture from leaks, poor ventilation, high humidity levels, and condensation buildup.
According to the U.S. EPA, indoor relative humidity should be kept below 60%—ideally between 30% and 50%—to help prevent mold growth and moisture problems.
These conditions create the perfect environment for mold spores to settle and multiply within insulation materials. Understanding what triggers this growth helps homeowners take the right steps to protect their homes.
The location of your insulation, the type of material used, and how well your home manages moisture all play important roles in whether mold will become a problem.
In this article, you’ll learn the key insulation mold growth causes, and how to stop moisture before it damages your home and air quality.
Below, we’ll walk through each important aspect:
- What causes mold growth inside home insulation?
- Where mold forms most often in your home's insulation
- How insulation materials impact mold growth
- How to prevent mold growth in insulation before it starts
- Professional solutions for insulation mold problems
Keep reading!Learning to identify the warning signs and prevent mold before it starts can save you from costly repairs and potential health issues down the road.
What causes mold growth inside home insulation?
Mold grows in home insulation when moisture gets trapped in areas with poor air circulation. Temperature differences and damaged materials create perfect conditions for fungal growth.
How moisture and humidity get trapped behind walls
Water enters wall cavities through multiple pathways. Roof leaks allow rainwater to drip onto insulation materials. Plumbing leaks behind walls soak nearby insulation.
Condensation forms when warm indoor air meets cold exterior walls. This moisture collects on insulation surfaces. High indoor humidity makes this problem worse.
Vapor barriers can trap moisture if installed incorrectly. The moisture gets stuck between the barrier and the wall. It cannot escape and creates wet conditions.
Common moisture sources include:
- Bathroom steam
- Kitchen cooking vapors
- Laundry room humidity
- Basement dampness
Temperature changes cause water vapor to condense inside walls. Winter heating creates more condensation problems. Summer air conditioning can also create moisture issues.
Weather events like storms drive rain into wall cavities. Missing or damaged caulking lets water seep in. Window and door leaks send moisture directly to insulation.
The link between poor ventilation and insulation mold
Stagnant air allows moisture to build up around insulation. Poor ventilation prevents wet insulation from drying out. Air cannot move freely to carry moisture away.
Blocked soffit vents trap humid air in attics. Ridge vents that don't work properly create similar problems. Bathroom fans that don't exhaust outside push moisture into walls.
Ventilation problems include:
- Missing or blocked vents
- Undersized exhaust fans
- Sealed air gaps from over-insulation
- Broken HVAC ductwork
Attic spaces need proper air flow to prevent moisture buildup. Insulation that blocks air paths creates dead zones. These areas stay damp longer.
Basement and crawl space ventilation affects wall moisture. Poor air circulation in these areas sends humidity upward. The moisture travels through wall cavities.
HVAC systems that don't control humidity make ventilation less effective. High indoor humidity overwhelms ventilation efforts. Dehumidification becomes necessary in these cases.
Why older or damaged insulation increases mold risks
Old insulation loses its ability to resist moisture. Fiberglass insulation compresses over time and holds more water. Cellulose insulation breaks down and becomes more absorbent.
Gaps in insulation create air movement problems. Torn or missing sections allow moisture to collect. Settled insulation leaves unprotected areas exposed.
Damage factors include:
- Pest infestations
- Water damage history
- Age-related breakdown
- Poor installation methods
Rodents and insects create holes in insulation barriers. Their waste adds organic material that feeds mold growth. Disturbed insulation cannot perform its moisture control function.
Previous water damage weakens insulation materials. Even dried-out insulation may have lost protective treatments. These materials absorb moisture faster than new insulation.
Improper installation creates moisture problems from the start. Compressed insulation traps air and moisture. Missing vapor barriers allow unrestricted water movement.
Where mold forms most often in your home's insulation
Certain areas of homes create perfect conditions for mold growth in insulation due to poor air circulation, temperature changes, and moisture buildup. Understanding these problem zones helps homeowners focus their prevention efforts where they matter most.
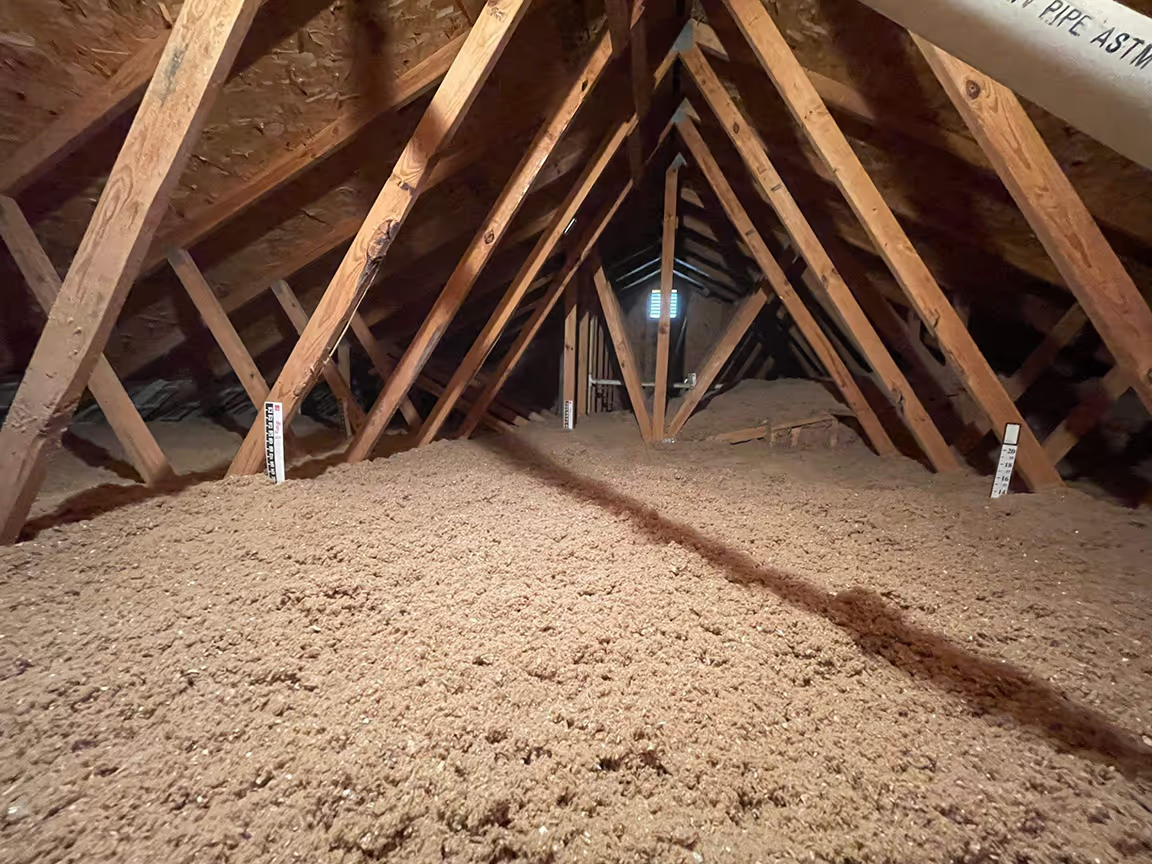
Common problem areas like attics, crawl spaces, and basements
Attics face the biggest mold challenges because hot air rises and meets cold roof surfaces. This creates condensation that soaks into insulation materials. Poor ventilation makes the problem worse by trapping humid air.
Attic mold causes include:
- Ice dams that force water under shingles
- Bathroom exhaust fans venting into attic space
- Air leaks from heated rooms below
- Blocked soffit or ridge vents
Crawl spaces develop mold problems when ground moisture rises into insulation. Dirt floors release water vapor that gets trapped in enclosed spaces. Crawl space insulation mold grows quickly in these damp conditions.
Foundation walls sweat when warm air hits cold concrete. This moisture drips onto floor insulation above. Poor vapor barriers make the issue worse.
Basements experience similar problems with foundation moisture and poor air flow. Water pipes create condensation when cold water runs through them. Finished basements trap moisture behind walls where insulation stays wet.
Signs your insulation may already be contaminated
Visual signs appear first in accessible areas. Homeowners should look for dark spots or discoloration on insulation surfaces. White, green, or black patches indicate active mold growth.
Fiberglass insulation changes color when mold grows on dust and debris trapped in the fibers. The material may look darker or have visible patches of growth.
Smell tests reveal hidden problems. Musty odors come from spaces behind walls or above ceilings. The smell gets stronger near heating vents when air moves through contaminated insulation.
Physical symptoms affect people living in the home. Residents may experience more coughing, sneezing, or respiratory problems. These health issues often get worse when heating or cooling systems run.
Insulation performance drops when mold damages the material. Higher energy bills may signal that wet or moldy insulation has lost its ability to regulate temperature.
How climate and regional humidity affect mold development
High humidity regions create year-round mold risks. Areas with humidity above 60% support mold growth in insulation materials. Coastal regions and southern climates face constant moisture challenges.
Temperature swings in northern climates cause condensation problems. Winter heating creates warm air that hits cold surfaces and forms water droplets. This cycle repeats daily in poorly insulated homes.
Seasonal patterns affect different insulation areas:
- Spring flooding threatens basement insulation
- Summer humidity impacts attic spaces
- Fall rain can penetrate roof and wall systems
- Winter ice dams force water into attic insulation
Regional building codes address local climate risks. Homes in humid areas require vapor barriers and ventilation systems. Cold climates need proper air sealing to prevent condensation.
Building materials react differently to local weather patterns. Some insulation types resist moisture better in specific climates. Homeowners should choose materials rated for their regional conditions.
How insulation materials impact mold growth
Different insulation materials have varying levels of resistance to mold growth. Some materials naturally resist moisture and mold, while others create perfect conditions for fungal development.
Differences between fiberglass, cellulose, and spray foam
Fiberglass insulation consists of glass fibers that don't provide food for mold. However, mold can grow on the paper backing and dust that settles on the fibers.
The glass fibers themselves resist mold growth. Problems occur when moisture gets trapped between the fibers and surrounding materials.
Cellulose insulation is made from recycled paper products. This organic material serves as food for mold when moisture is present.
Cellulose often contains boric acid treatments that help resist mold. These treatments can lose effectiveness over time, especially in wet conditions.
Spray foam insulation creates an air-tight barrier that prevents moisture infiltration. Closed-cell spray foam has the highest moisture resistance.
Open-cell spray foam allows some moisture movement. Both types resist mold growth on their surface but can trap moisture behind them if not installed properly.
Why certain insulation types resist mold better than others
Moisture resistance plays the biggest role in mold prevention. Materials that repel water or dry quickly have better mold resistance.
Inorganic materials like fiberglass don't feed mold growth. They only develop problems when organic dust or debris accumulates on their surface.
Dense materials prevent air movement that can carry moisture and mold spores. Spray foam creates the most effective moisture barrier.
Chemical treatments in some insulation types actively prevent mold growth. These treatments work best in dry conditions.
Materials that trap moisture create perfect conditions for mold. Poor installation can turn any insulation type into a mold risk.
Choosing mold-resistant materials for long-term protection
Closed-cell spray foam offers the best mold protection. It blocks moisture completely and doesn't provide food for mold growth.
This option costs more upfront but prevents moisture problems that lead to expensive repairs.
Fiberglass without paper backing eliminates the main food source for mold. Choose products with foil or plastic facings instead of paper.
Mineral wool insulation resists moisture and doesn't support mold growth. It maintains its properties even when wet.
Avoid cellulose in high-moisture areas like basements or bathrooms. The organic materials will eventually support mold growth despite chemical treatments.
Consider local climate conditions when selecting materials. High-humidity areas need more moisture-resistant options.
How to prevent mold growth in insulation before it starts
Stopping mold growth requires controlling moisture, sealing air leaks, and maintaining proper ventilation around insulation materials. Homeowners must also know when damaged insulation needs complete replacement to protect their home's air quality.
Proper air sealing and ventilation strategies
Air sealing prevents warm, moist air from reaching cold surfaces where condensation forms. Homeowners should seal gaps around electrical outlets, plumbing penetrations, and recessed lights before installing insulation.
Critical sealing locations include:
- Attic hatches and pull-down stairs
- Chimney and flue penetrations
- Wire and pipe holes
- Top plates of interior walls
Proper ventilation removes excess moisture from insulated spaces. Attics need intake vents under the eaves and exhaust vents at the ridge or gables.
The ventilation system should provide 1 square foot of vent area for every 150 square feet of attic space. This airflow prevents moisture buildup that leads to mold growth on insulation.
Crawl spaces require different approaches. Vented crawl spaces need cross-ventilation with vents on opposite walls. Encapsulated crawl spaces need sealed vapor barriers and controlled ventilation systems.
Importance of moisture barriers and vapor control
Vapor barriers control moisture movement through building materials. These plastic or foil barriers go on the warm side of insulation in cold climates.
In most U.S. homes, vapor barriers belong on the interior side of wall insulation. This placement stops warm indoor air from carrying moisture into cold insulation cavities.
According to the U.S. Department of Energy, vapor diffusion retarders perform best when installed on the warm side of the assembly, toward the interior in cold climates and toward the exterior in hot/wet climates, so placement should follow your local climate.
Vapor barrier materials include:
- 6-mil polyethylene plastic sheeting
- Kraft paper backing on fiberglass batts
- Foil-faced rigid foam boards
- Special vapor-retardant paints
Installation requires careful attention to seams and penetrations. All joints need sealing with tape or caulk to maintain the moisture barrier.
Some climates don't need vapor barriers. Hot, humid regions may benefit from vapor-permeable materials that let moisture dry outward. Homeowners should check local building codes for specific requirements.
When to replace contaminated insulation for a healthy home
Moldy insulation often cannot be cleaned effectively and requires complete removal. Visual inspection reveals dark spots, staining, or fuzzy growth on insulation materials.
Replace insulation when it shows:
- Visible mold growth or dark discoloration
- Persistent musty odors after cleaning attempts
- Damage from water leaks or flooding
- Compressed or deteriorated condition
Fiberglass and cellulose insulation hold moisture and provide food sources for mold. Once contamination occurs, these materials typically need full replacement rather than cleaning.
Professional removal protects occupants from airborne spores during the process. Contractors use containment barriers and air filtration equipment to prevent spreading contamination.
New insulation installation should address the original moisture source. This includes fixing leaks, improving ventilation, and installing proper vapor barriers to prevent future mold problems.
Professional solutions for insulation mold problems
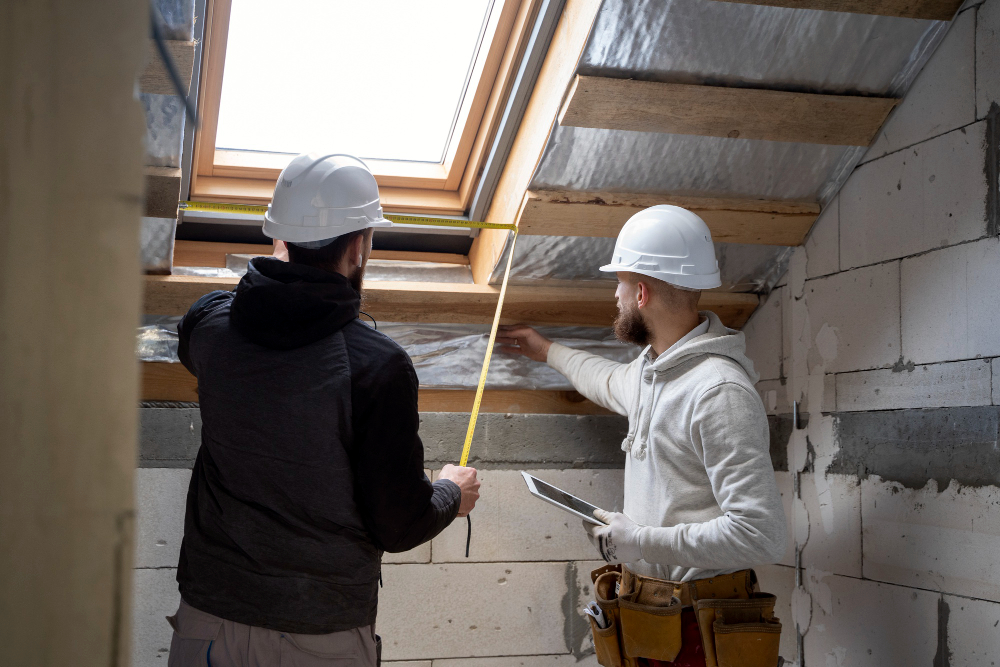
Certified mold remediation specialists use advanced detection equipment to find hidden mold and employ safe removal techniques that protect both workers and homeowners. They also provide specific maintenance strategies to prevent future moisture problems in insulation systems.
How experts inspect and test for hidden mold
Professional mold inspectors use thermal imaging cameras to detect temperature differences that indicate moisture problems behind walls. These cameras reveal cold spots where insulation may be wet or missing.
Air quality tests measure mold spore levels throughout the home. Inspectors take samples from different rooms to compare spore counts and identify problem areas.
Moisture meters check the water content in building materials. Professionals insert probes into insulation and surrounding materials to find exact moisture levels.
Detection Method
What It Finds
Time Required
Thermal imaging
Moisture patterns
30-60 minutes
Air sampling
Spore levels
2-3 hours
Moisture testing
Water content
15-30 minutes
Borescopes allow inspectors to see inside wall cavities without major demolition. They insert a small camera through tiny holes to examine insulation condition.
Surface sampling involves taking swabs from visible mold growth. Lab testing identifies the exact mold species and helps determine the best removal approach.
Safe removal and replacement of moldy insulation
Remediation crews seal off work areas with plastic sheeting to prevent mold spores from spreading. They use negative air pressure machines to keep contaminated air from moving to clean areas.
Workers wear full protective equipment including respirators, gloves, and disposable suits. This gear protects them from breathing mold spores during removal.
All moldy insulation gets bagged and disposed of as hazardous waste. Teams cannot clean or reuse contaminated insulation materials.
After removal, professionals treat all surfaces with antimicrobial solutions. These treatments kill remaining mold spores on wood framing and other building materials.
New insulation installation only happens after the area is completely dry. Moisture levels must drop below 20% before replacement begins.
Quality contractors also fix the original moisture source. This might involve repairing roof leaks, improving ventilation, or sealing air gaps.
Long-term maintenance tips to keep your insulation dry
Homeowners should check attic insulation twice yearly for signs of moisture damage. Look for dark stains, musty odors, or wet spots during spring and fall inspections.
Proper ventilation prevents moisture buildup in insulation areas. Attics need both intake vents under eaves and exhaust vents near the roof peak.
Bathroom and kitchen exhaust fans must vent outside the home. Fans that dump moist air into attics create perfect conditions for mold growth.
According to the EPA’s mold guidance, vent moisture-generating appliances to the outside (e.g., dryers) and keep HVAC drip pans clean and unobstructed to reduce indoor moisture and mold risk.
Gutters need regular cleaning to prevent water overflow onto exterior walls. Clogged gutters cause water to seep behind siding and into insulation.
Air sealing stops warm indoor air from reaching cold surfaces where condensation forms. Professional energy audits identify the biggest air leak sources.
HVAC systems require annual maintenance to control humidity levels. Clean filters and properly functioning equipment keep indoor moisture between 30-50%.
Dehumidifiers help in basements and crawl spaces where natural ventilation is limited. Set them to maintain humidity below 60% year-round.
Conclusion
Mold growth on insulation stems from three main factors working together. Moisture creates the foundation for all mold problems. Organic materials provide food for mold spores. Poor air circulation allows conditions to persist.
Different insulation types face varying mold risks. Fiberglass and cellulose are more vulnerable than foam options. However, any material can develop mold when conditions align.
Homeowners should address small mold issues quickly. Professional help becomes necessary for extensive growth or health concerns. Moldy insulation typically requires complete replacement rather than cleaning.
Understanding these causes helps property owners take action before problems develop. Regular maintenance and proper installation create the best defense against insulation mold growth.
Schedule a moisture intrusion inspection and insulation remediation assessment with Terra Insulation—book a site visit or request a written, itemized quote today.