Attic sealing and insulation service involves closing air gaps and adding proper insulation to stop energy loss, lower utility costs, and improve indoor comfort.
Your home loses a lot of energy through your attic if it's not properly sealed and insulated. Air leaks and poor insulation force your heating and cooling system to work harder, which drives up your energy bills and makes your home less comfortable.
Pairing air sealing with attic insulation is a proven way to reduce HVAC-related energy waste; according to ENERGY STAR (U.S. EPA), homeowners can save an average of about 15% on heating and cooling costs (about 11% on total energy costs) by air sealing and adding insulation in key areas such as attics.
The combination approach tackles both air leakage and heat transfer problems at the same time. Professional contractors use specific materials and techniques to seal cracks and install the right type of insulation for each home.
This article explains the key signs that an attic needs attention, the different insulation options available, and what to expect from the installation process.
Here's what you need to know:
- What is attic sealing and insulation service and why it matters
- Signs your attic needs sealing and insulation
- Types of attic insulation and sealing solutions
- How professional attic sealing and insulation works
- Benefits of professional attic sealing and insulation
- DIY vs professional attic sealing and insulation
- How to maintain your attic insulation and sealing
- Why choose Terra Insulation for attic sealing and insulation
Keep reading! Understanding what these services include, how they work, and whether to hire a professional can help homeowners make smart decisions about their attic.
What is attic sealing and insulation service and why it matters
Attic sealing and insulation services address two connected problems that affect almost every home: air leaks in the attic floor and inadequate insulation levels. These services work together to control heat flow and prevent air from moving between living spaces and the attic.
Understanding how sealing and insulation improve home comfort
Air sealing creates a barrier that stops air movement through gaps and cracks in the attic floor. These openings typically appear around light fixtures, plumbing pipes, electrical wires, and other penetrations through the ceiling. When these gaps remain open, conditioned air escapes from living spaces into the attic.
Insulation works differently by slowing down heat transfer through solid materials. It reduces the rate at which heat moves through the attic floor during summer and winter. The insulation material traps air in small pockets, which makes it harder for heat to pass through.
Air sealing must happen before insulation installation. Sealing the gaps first ensures that insulation can do its job properly. Without air sealing, warm air rises through gaps in winter regardless of how much insulation sits on top. The same principle applies in summer when hot attic air pushes down into cooler living spaces.
The two services create different effects that complement each other. Air sealing stops convection, while insulation stops conduction. Together, they maintain stable indoor temperatures for longer periods.
How air leaks and poor insulation affect energy bills
Air leaks force heating and cooling systems to run more often. When conditioned air escapes through attic gaps, the HVAC system must work continuously to replace it. This constant operation increases energy consumption month after month.
Department of Energy (DOE) Building America program, sealing uncontrolled air leaks can typically produce about 10% to 20% savings on heating and cooling bills (often higher in older, leakier homes).
Poor insulation allows heat to transfer freely between the attic and living spaces. In winter, heated air loses warmth to the cold attic above. In summer, attic heat radiates down into cooled rooms below. The HVAC system compensates by running longer cycles to maintain the desired temperature.
These problems combine to create significant waste:
- Heating systems burn more fuel or consume more electricity
- Air conditioning units run extra hours during hot weather
- Energy bills stay elevated throughout every season
- Equipment experiences faster wear from constant operation
Homes with both air leaks and poor insulation typically see the highest energy costs. The combined effect creates a continuous cycle of heat loss and gain that no HVAC system can efficiently manage.
Benefits of a professionally sealed and insulated attic
Professional service ensures complete coverage of air leak locations that homeowners often miss. Trained technicians identify gaps around recessed lights, plumbing stacks, electrical boxes, and HVAC penetrations. They use appropriate materials for each type of opening, including caulk, foam, and weather stripping.
Proper insulation installation achieves the recommended R-value for the climate zone. Professionals install insulation at consistent depths without gaps or compression. They avoid common mistakes like blocking soffit vents or covering recessed lights incorrectly.
Key advantages of professional service:
- Lower energy bills through reduced heating and cooling demand
- Consistent temperatures in all rooms throughout the year
- Better air quality by preventing attic dust and contaminants from entering living spaces
- Pest prevention by eliminating entry points for insects and rodents
- Moisture control that reduces the risk of mold growth
The investment typically pays for itself through energy savings over several years. Homes also gain improved comfort that makes living spaces more pleasant during extreme weather. Professional work includes proper ventilation planning to prevent moisture problems that can damage roof structures.
Signs your attic needs sealing and insulation
Poor attic sealing and insulation create noticeable problems throughout a home. Homeowners often experience temperature inconsistencies, unexpectedly high utility costs, uncomfortable drafts, and visible deterioration in their attic space.
Uneven temperatures in your home
Different rooms maintaining different temperatures indicates air leakage and poor insulation in the attic. A bedroom might feel uncomfortably warm while the living room stays cold, even when the thermostat is set to the same temperature throughout the house.
These temperature differences become more obvious during extreme weather. Rooms directly beneath the attic typically show the most variation since heat escapes through an unsealed attic in winter and penetrates down in summer.
The HVAC system struggles to maintain consistent temperatures when the attic lacks proper sealing. This forces the heating and cooling equipment to run longer cycles without achieving the desired comfort level in all areas of the home.
High energy bills despite moderate usage
Energy costs that increase without changes in usage patterns often point to attic problems. The heating and cooling system works harder to compensate for air escaping through gaps and insufficient insulation barriers.
A home with adequate attic sealing and insulation typically uses 15-20% less energy than one without proper protection. Bills that climb steadily over several months suggest the attic is no longer performing its function effectively.
Comparing current bills to previous years during the same season reveals unusual increases. A spike of $30-50 or more per month in heating or cooling costs warrants an attic inspection to identify sealing and insulation issues.
Drafts or cold spots near vents and ceilings
Noticeable air movement near ceiling fixtures, recessed lights, or attic access points signals unsealed gaps. These drafts feel particularly strong during windy conditions or when temperature differences between indoor and outdoor air are significant.
Cold spots on ceilings during winter indicate missing or compressed insulation above those areas. The ceiling surface temperature drops because insufficient insulation allows heat to escape into the attic space.
Homeowners can detect these issues by carefully moving their hand near ceiling edges, light fixtures, and vents. Any sensation of moving air or temperature changes reveals locations where sealing has failed or never existed.
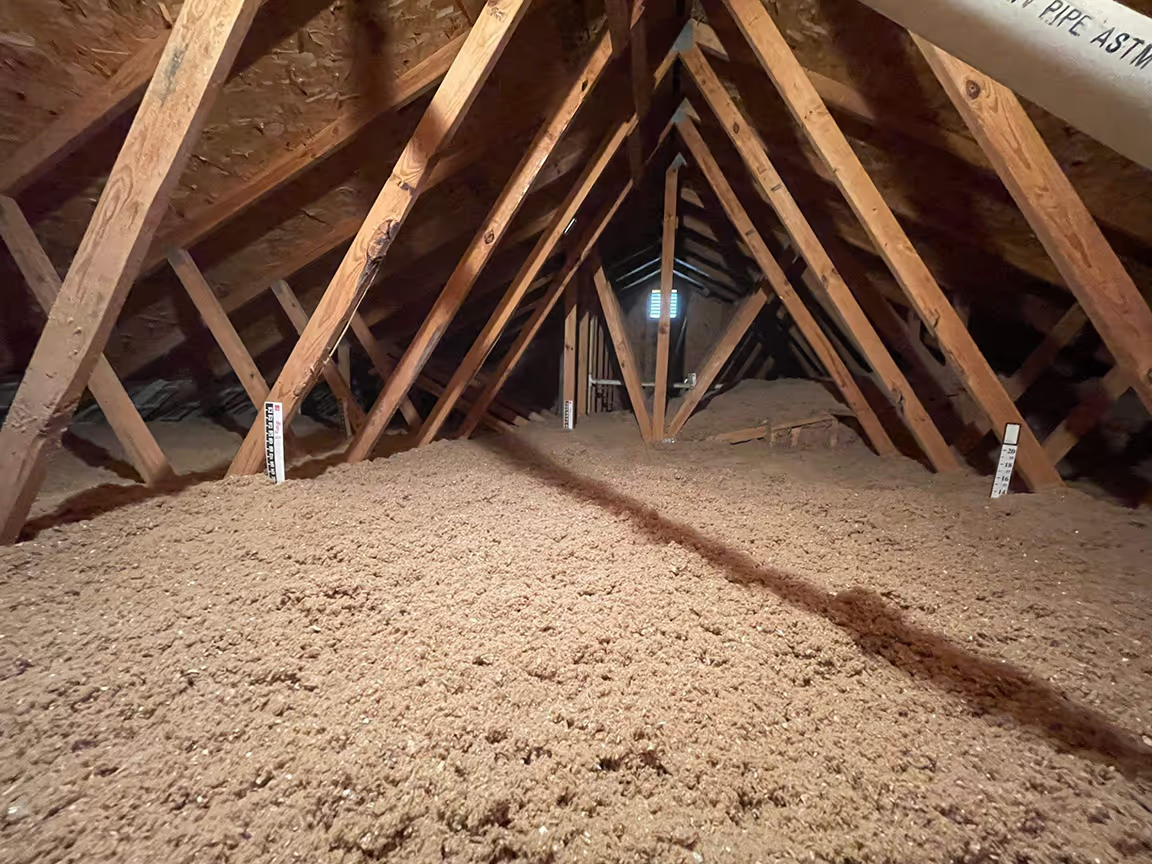
Visible gaps or damaged insulation in the attic
Physical inspection of the attic reveals obvious problems requiring attention. Gaps around pipes, wires, chimneys, and ductwork allow air to flow freely between living spaces and the attic.
Insulation that appears compressed, discolored, or water-stained has lost its effectiveness. Rodent droppings, nesting materials, or torn sections indicate pest damage that compromises both sealing and insulation performance.
The insulation should be evenly distributed and maintain its full thickness without settling or compression. If floor joists are visible through the insulation or coverage appears spotty, the attic needs additional material to reach proper R-value levels.
Types of attic insulation and sealing solutions
Different insulation materials serve specific purposes in attic spaces, with some focusing on thermal resistance while others provide both insulation and air barrier functions. Professional installers often combine multiple products to address both heat transfer and air leakage problems.
Spray foam insulation for air sealing and thermal performance
Spray foam stands out as the most effective option for combined insulation and air sealing. The material expands when applied, filling gaps and creating an airtight barrier that stops unwanted air movement between living spaces and the attic.
Two main types exist:
- Closed-cell foam offers higher R-values (around R-6 to R-7 per inch) and adds structural strength
- Open-cell foam provides R-3.5 to R-4 per inch and costs less but allows some moisture movement
This material bonds directly to roof decking, rafters, and attic floors. It eliminates the need for separate air sealing services since it blocks air leaks as it insulates. The high R-value means less thickness is needed compared to other materials to reach target insulation levels.
The main drawback is cost. Spray foam typically runs two to three times higher than blown-in options. It also requires professional installation with specialized equipment.
Blown-in cellulose and fiberglass insulation
Blown-in materials work well for covering attic floors and filling irregular spaces. Cellulose consists of recycled paper products treated with fire retardants, while fiberglass uses tiny glass fibers.
Cellulose offers R-3.2 to R-3.8 per inch and settles less than fiberglass over time. It resists air movement better due to its dense composition. The material also handles moisture better than fiberglass when properly ventilated.
Fiberglass provides R-2.2 to R-2.7 per inch and costs less than cellulose. It doesn't settle as much initially but offers lower resistance to air flow.
Both materials require separate air sealing work before installation. Technicians must seal gaps, cracks, and penetrations around wiring, pipes, and ductwork first. Without proper sealing, air can flow through these insulation types and reduce their effectiveness.
Combination solutions for maximum efficiency
Most professional attic projects use multiple products to address different needs. A common approach involves spray foam around the perimeter and penetrations with blown-in material across the main attic floor.
Typical combinations include:
Area
Material
Purpose
Rim joists and edges
Spray foam
Air sealing and insulation
Around chimneys and vents
Spray foam
Complete air barrier
Main attic floor
Blown-in cellulose or fiberglass
Cost-effective coverage
This strategy delivers the air sealing benefits of foam where leaks occur most while keeping costs manageable. The blown-in material adds bulk insulation across large areas where air leakage is less common.
Some contractors apply a thin spray foam layer across the entire attic floor first, then top it with blown-in insulation. This method creates a complete air barrier under the thermal layer.
How professional attic sealing and insulation works
Professional attic work follows a systematic approach that addresses air leaks first, then adds insulation to maximize energy efficiency. The process involves four key stages that ensure proper coverage and long-term performance.
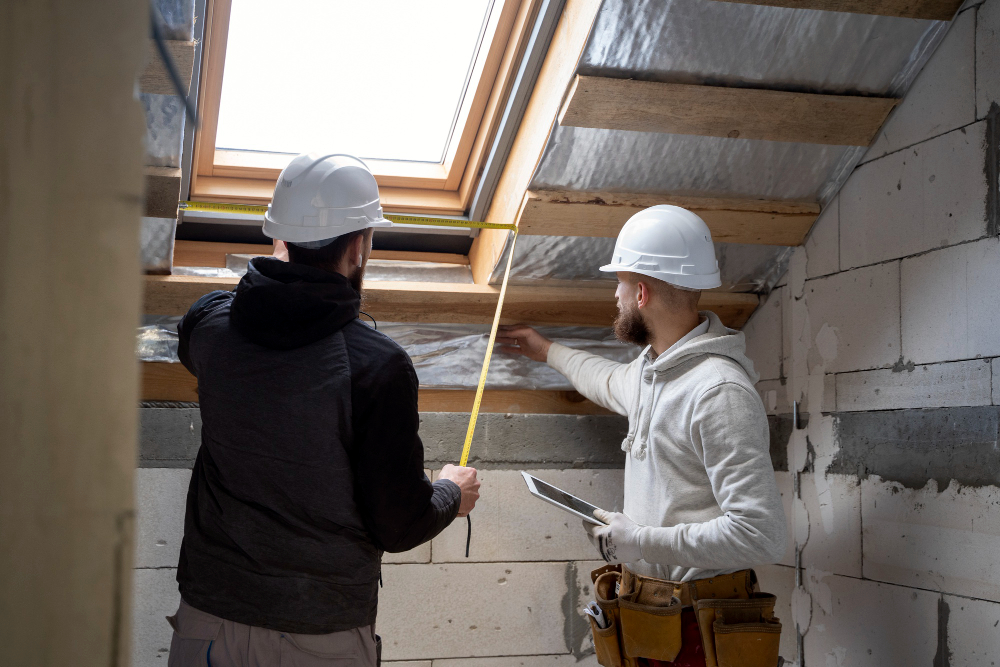
Inspection and assessment of current insulation and leaks
A professional contractor begins by examining the attic space to identify problem areas. They look for gaps around chimneys, plumbing pipes, electrical wiring, and recessed lights where air commonly escapes. The inspector checks the condition of existing insulation to determine if it needs removal or can stay in place.
They measure current insulation levels and note any moisture damage or pest activity. Thermal imaging cameras help locate hidden air leaks that aren't visible to the naked eye. The contractor documents all findings and creates a detailed plan for the work ahead.
This assessment determines the scope of work needed and helps provide an accurate cost estimate. The inspection typically takes one to two hours depending on attic size and complexity.
Air sealing cracks, gaps, and penetrations
Professionals seal all air leaks before installing new insulation. They use spray foam to close gaps around chimneys, plumbing penetrations, and ceiling fixtures. Larger openings require different materials like metal flashing or rigid foam boards.
Caulk works well for small cracks along the attic floor and around electrical boxes. Weather stripping seals access doors and hatches to prevent air movement. The contractor pays special attention to areas where walls meet the ceiling, as these spots often have significant leaks.
Common air sealing locations include:
- Around HVAC ducts and vents
- Electrical wire penetrations
- Plumbing stack openings
- Recessed lighting fixtures
- Attic hatch frames
- Wall top plates
Air sealing must happen before insulation because spray foam and caulk need direct access to the gaps. This step amplifies insulation performance by stopping airflow that would otherwise bypass the thermal barrier.
Air sealing is not optional if you want insulation to perform as intended; according to Oak Ridge National Laboratory, homeowners should seal attic-to-home air leaks (around chases, penetrations, and fixtures) because most insulation does not stop air flow on its own.
Installation of high-performance insulation materials
After air sealing completes, the contractor installs new insulation. They select materials based on the home's needs, climate zone, and budget. Blown-in cellulose or fiberglass works well for covering large attic floors quickly and filling irregular spaces.
Spray foam insulation provides both air sealing and insulation in one application. Batt insulation fits between joists in attics with regular spacing. The installer ensures even coverage without gaps or compressed areas that reduce effectiveness.
Professional installers achieve recommended R-values for the specific climate zone. They maintain proper ventilation in the attic to prevent moisture buildup. Insulation doesn't touch recessed lights or other heat-generating fixtures unless they're rated for direct contact.
The installation process typically takes one to three days depending on attic size and insulation type.
Post-installation inspection for optimal performance
The contractor performs a final inspection after attic insulation installation completes. They verify that all air leaks are sealed and insulation reaches the proper depth throughout the space. The inspector checks that ventilation baffles remain clear and roof vents aren't blocked.
They ensure insulation doesn't cover electrical junction boxes or create fire hazards near heat sources. Photos document the completed work for the homeowner's records. Many contractors conduct a blower door test to measure overall home air tightness improvement.
This quality check confirms the work meets building codes and industry standards. The contractor provides care instructions and answers questions about maintaining the new insulation system.
Benefits of professional attic sealing and insulation
Professional attic sealing and insulation work together to create a protective barrier that stops air leaks and heat transfer in your home. These services deliver measurable improvements in energy costs, comfort levels, moisture control, and property value.
Lower energy bills and improved HVAC efficiency
Professional attic sealing and insulation can cut annual energy expenses by 15% or more in typical homes. The combination of sealed air gaps and proper insulation prevents conditioned air from escaping through the attic. This means heating and cooling systems don't have to work as hard to maintain desired temperatures.
Air sealing closes holes around chimneys, pipes, and light fixtures using spray foam or caulk. Insulation then adds a thermal barrier that slows heat transfer. Without air sealing, gaps allow airflow that bypasses insulation entirely.
HVAC systems run shorter cycles when the home holds temperature better. This reduces wear on equipment and extends its lifespan. Lower energy usage appears directly on monthly utility bills, making the investment pay for itself over time.
Enhanced indoor comfort year-round
Professional installation eliminates hot and cold spots throughout the home. Proper attic insulation keeps heat inside during winter and blocks it during summer. Rooms stay at more consistent temperatures without constant thermostat adjustments.
Air sealing stops drafts that make spaces feel uncomfortable even when the thermostat reads the right temperature. It also reduces outdoor noise from entering the home. Sealed attics prevent dust and outdoor allergens from infiltrating living spaces through gaps and cracks.
Temperature stability means fewer complaints about rooms being too hot or cold. Homeowners notice the difference within days of professional installation.
Reduced risk of moisture damage and mold growth
Attic air sealing and insulation act as protective barriers against moisture infiltration. Unsealed attics allow humid air to enter, creating damp conditions where mold thrives. Professional installation includes proper ventilation to keep the attic dry.
Moisture in attics leads to several problems:
- Wood rot in roof decking and rafters
- Mold growth that spreads to living spaces
- Damaged insulation that loses effectiveness
- Unpleasant odors throughout the home
Professionals seal penetrations and install vapor barriers where needed. They ensure ventilation systems work correctly to remove excess humidity. This prevents condensation from forming on cold surfaces during winter months.
Mold causes both structural damage and health issues for occupants. Preventing moisture problems protects the home and the people living in it.
Increased home value and energy efficiency rating
Energy-efficient attic solutions make homes more attractive to buyers. Professional attic insulation and air sealing improve energy performance ratings used in home assessments. These upgrades represent permanent improvements that transfer to new owners.
Home appraisers recognize quality insulation and air sealing as value-adding features. Energy certifications and utility bill history demonstrate real savings to potential buyers. Many buyers specifically look for homes with updated insulation systems.
The investment in professional services adds measurable value beyond just energy savings. Homes with proper attic treatment sell faster and command higher prices than comparable properties without these upgrades. Documentation from professional installers provides proof of quality work that reassures buyers about the home's condition.
DIY vs professional attic sealing and insulation
Homeowners who want to insulate their attics face a choice between doing the work themselves or hiring professionals. Each approach has different requirements for skills, equipment, and costs that affect the final results.
Risks of improper installation
Installing attic insulation without proper training can lead to serious problems. Missing air leaks around pipes, vents, and light fixtures reduces energy efficiency and wastes money on heating and cooling. Compressed or unevenly distributed insulation fails to achieve the proper R-value, which measures how well the material resists heat flow.
Moisture issues develop when ventilation gets blocked during installation. Trapped moisture causes mold growth, wood rot, and structural damage over time. DIY installers often miss critical steps like installing baffles to maintain airflow from soffit vents.
Safety hazards also increase with improper installation. Fiberglass particles irritate skin, eyes, and lungs without proper protective equipment. Disturbing old insulation may release dangerous materials like asbestos. Stepping between joists instead of on them can cause falls through the ceiling below.
Specialized equipment and materials required
Professional insulation work requires specific tools that most homeowners don't own. Insulation blowers distribute loose-fill materials evenly across large attic spaces. Spray foam equipment needs specialized training to operate safely and achieve the right mixture ratios.
Essential professional equipment includes:
- Protective gear (respirators, goggles, full-body suits)
- Insulation blowers for cellulose or fiberglass
- Spray foam rigs with proper mixing systems
- Thermal imaging cameras to detect air leaks
- Ventilation calculators and measuring tools
Contractors also have access to commercial-grade materials at better prices than retail stores. They know which insulation types work best for specific climate zones and building codes. DIY projects with fiberglass batts might cost $150 to $700 for a 500-square-foot attic, while professional installation ranges from $1,000 to $2,400 for the same space.
Why hiring experts ensures long-term energy savings
Professional installers seal all air leaks before adding insulation, which maximizes energy efficiency. They identify problem areas that untrained eyes miss, such as gaps around recessed lighting and plumbing penetrations. This complete approach prevents heated or cooled air from escaping through the attic.
Experts install insulation to the correct depth throughout the entire space. Uneven coverage creates cold spots that reduce overall performance. They also maintain proper ventilation to prevent moisture problems that degrade insulation over time.
Quality installation affects how long the insulation performs. Fiberglass typically lasts 20 to 30 years when installed correctly, while spray foam can last indefinitely with proper maintenance. Poor DIY installation may require costly repairs or complete reinstallation within a few years, eliminating any initial savings.
How to maintain your attic insulation and sealing
Regular maintenance helps keep insulation effective and air sealing intact. Homeowners should check for air leaks, monitor insulation levels, and control moisture to protect their investment.
Periodic inspection for air leaks
Homeowners should inspect their attic at least once per year to find air leaks. Common problem areas include gaps around pipes, electrical wiring, recessed lights, and the attic hatch. These spots allow conditioned air to escape and outside air to enter.
A simple way to find leaks is to look for dirty insulation. Dark spots on insulation material indicate air has been filtering through and depositing dust. On cold days, homeowners can hold their hand near suspected leak points to feel drafts.
Key areas to check:
- Around chimneys and flue pipes
- Where walls meet the attic floor
- Attic access doors and pull-down stairs
- Plumbing and electrical penetrations
- HVAC ductwork connections
When leaks are found, they should be sealed with appropriate materials. Caulk works well for small gaps under one-quarter inch. Expanding foam fills larger openings around pipes and wires. Weatherstripping improves the seal on attic doors and hatches.
Replacing or topping up insulation as needed
Insulation settles and compresses over time, reducing its effectiveness. Homeowners should measure insulation depth during annual inspections. Most attics need 10 to 14 inches of fiberglass or 13 to 18 inches of cellulose insulation to meet recommended R-values.
Signs that insulation needs attention include uneven temperatures between rooms, ice dams in winter, and higher energy bills. Damaged insulation from water leaks or pest activity requires immediate replacement. Wet insulation loses its insulating properties and can grow mold.
Adding new insulation on top of old material is acceptable if the existing layer is dry and undamaged. Different insulation types can be combined, but faced insulation should not be layered to avoid trapping moisture.
Ensuring ventilation and moisture control
Proper ventilation prevents moisture buildup that damages insulation and wood structures. Attics need both intake vents at the eaves and exhaust vents near the ridge. Air should flow freely from soffit to roof peak without obstruction.
Insulation should never block soffit vents. Baffles installed between rafters maintain airflow channels while allowing full insulation coverage. The ratio should be one square foot of ventilation for every 150 square feet of attic space.
Bathroom and kitchen exhaust fans must vent outside, not into the attic. Dryer vents require the same treatment. Moisture from these sources saturates insulation and creates conditions for mold growth. Homeowners should check that all vent pipes exit through the roof or sidewall and seal properly where they penetrate.
Why choose Terra Insulation for attic sealing and insulation
Terra Insulation brings trained professionals, proper safety protocols, and full-service expertise to every attic project. Their team handles each step from initial inspection through final installation.
Licensed and experienced technicians
Terra Insulation employs technicians who hold proper licensing and certifications for insulation work. These professionals understand local building codes and energy efficiency standards.
The team has completed training in identifying air leak sources and selecting appropriate insulation materials. They know how to locate common problem areas like top plates, recessed lights, attic hatches, and ceiling penetrations where air typically escapes.
Experience matters when working in attic spaces because:
- Each home has unique structural features
- Different homes require different sealing approaches
- Older homes often have hidden gaps that need expert detection
Their technicians can assess R-value requirements based on climate zones. They also understand how ventilation systems interact with insulation to prevent moisture problems.
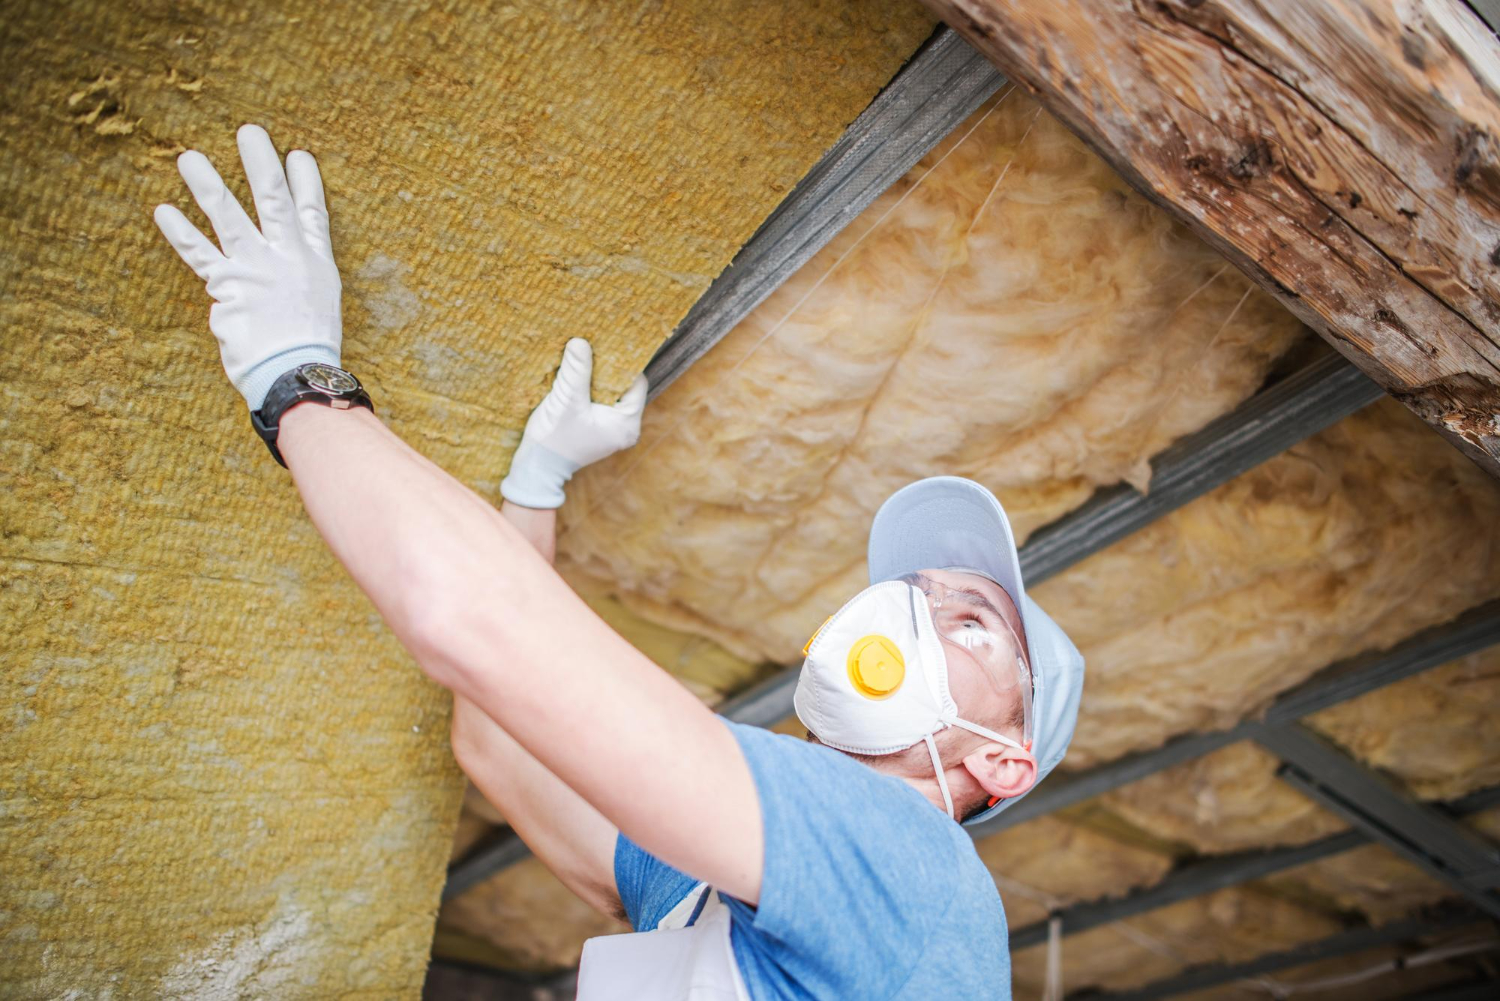
Safe handling of insulation materials
The company follows safety protocols when working with fiberglass, cellulose, and spray foam products. Their crews use proper protective equipment and contain work areas to prevent material spread throughout the home.
Insulation materials can pose health risks if handled incorrectly. Fiberglass particles irritate skin and lungs. Spray foam requires precise application to avoid off-gassing issues.
Terra Insulation's teams seal off work zones using plastic barriers. They use ventilation equipment when applying spray foam products. All debris gets bagged and removed rather than left in living spaces.
The company also checks for existing hazards before starting work. This includes testing for asbestos in older insulation and identifying electrical wiring that needs protection during installation.
Comprehensive service from assessment to installation
Terra Insulation starts each project with a detailed attic inspection. They measure current insulation levels, identify air leaks, and check for moisture damage or mold growth.
The assessment includes thermal imaging to find hidden gaps where conditioned air escapes. Technicians also evaluate attic ventilation to ensure it meets requirements for the insulation type being installed.
After the inspection, they provide a written plan outlining recommended air sealing locations and insulation specifications. This includes the type of insulation, target R-value, and estimated energy savings.
The installation process addresses air sealing first, then adds new insulation. Teams clean up completely and perform a final inspection to verify proper coverage and ventilation clearances around fixtures.
Conclusion
Attic sealing and insulation work together to create a more comfortable and efficient home. Air sealing closes gaps and cracks that let conditioned air escape, while insulation helps maintain consistent temperatures throughout the year.
Homeowners who invest in these services typically see lower energy bills within the first few months. The improvements also reduce the workload on heating and cooling systems, which can extend their lifespan.
Professional installation ensures the job is done correctly. Trained technicians know where air leaks commonly occur and which materials work best for different situations. They can also identify potential ventilation issues before they become problems.
Property owners should consider their climate, current insulation levels, and budget when planning these upgrades. A professional assessment can reveal specific problem areas and help prioritize improvements.
Most homes see the greatest returns when air sealing happens before adding new insulation. This combination creates an effective barrier against energy loss. The initial cost is offset by ongoing savings and improved comfort that lasts for years.
Choosing qualified contractors makes a significant difference in results. Homeowners should verify credentials, ask for references, and get detailed proposals before starting work.
If you want an energy-efficient attic solution tailored to your home, contact Terra Insulation to schedule an on-site attic evaluation and request a written estimate for attic sealing and insulation.