Thermal barriers are required by building codes for certain types of insulation, particularly spray foam, and must meet specific fire resistance standards including the 15-minute rule
When we talk about home insulation, most homeowners focus on R-values and material types, but there's a critical safety component that often gets overlooked: thermal barriers. These protective layers prevent insulation materials from becoming fire hazards by slowing down flame spread and giving occupants precious time to evacuate during emergencies.
Without proper thermal barriers, some insulation materials can ignite quickly and release toxic gases, turning what should be a safety feature into a dangerous liability.
We'll walk you through everything you need to know about thermal barrier requirements, help you understand which insulation types need them, and explain what to expect during professional installation.
Below, are the main topics:
- What is a thermal barrier and why it matters
- Understanding the 15-minute thermal barrier rule
- Choosing the right thermal barrier for your insulation type
- Benefits and limitations of thermal barrier insulation
- Installation insights: What to expect from a professional job
By the end of this guide, you'll have the knowledge to make informed decisions about your home's insulation safety and ensure your installation meets all necessary codes.
What is a thermal barrier and why it matters
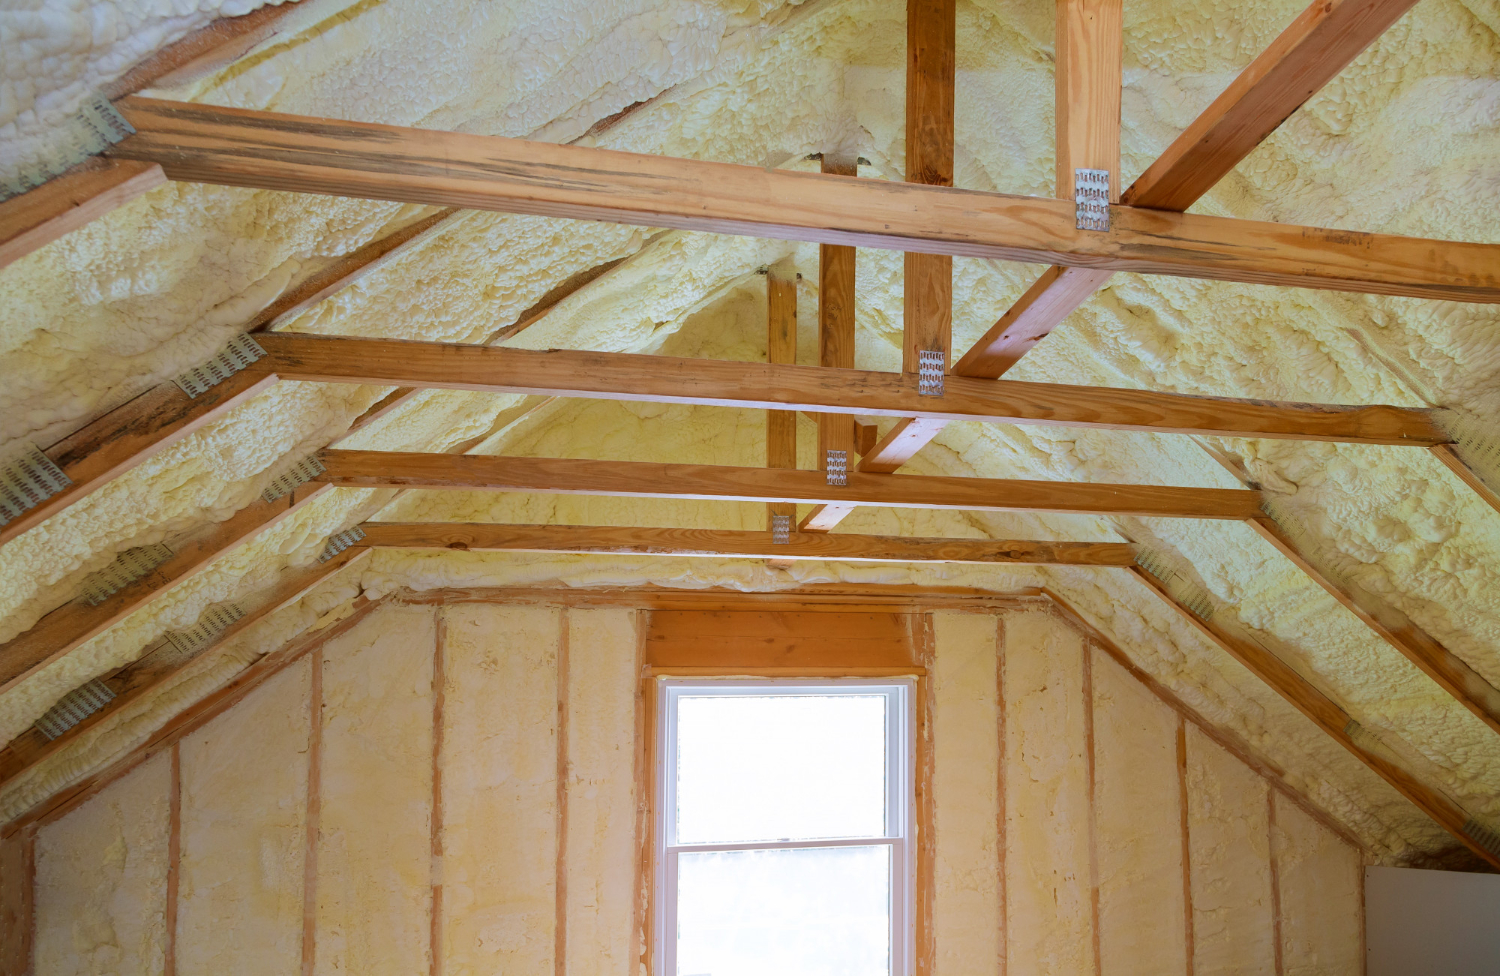
A thermal barrier is a specialized fire-resistant material that sits between spray foam insulation and living spaces to slow heat transfer and provide fire protection. Unlike regular insulation, thermal barriers must meet specific fire safety codes and protect against high-temperature exposure.
The difference between insulation and a thermal barrier
Many homeowners confuse thermal barriers with regular insulation, but they serve different purposes. Insulation focuses on preventing heat loss and gain for energy efficiency. It works by creating air pockets that slow temperature transfer.
Thermal barriers protect against fire and extreme heat. They must pass strict fire resistance tests. Building codes require them in specific situations, especially with spray foam insulation.
Key Differences:
Feature
Insulation
Thermal Barrier
Primary purpose
Energy efficiency
Fire protection
Fire resistance
Limited
Required by code
Material thickness
Varies widely
Specific requirements
Installation location
Throughout walls/attic
Between foam and living space
Regular insulation materials like fiberglass or cellulose cannot serve as thermal barriers. We need both systems working together for complete protection.
How thermal barriers protect against fire and heat transfer
Thermal barriers slow down heat transfer during a fire emergency. They buy precious time for occupants to escape safely. The barrier material absorbs heat and releases it slowly.
During normal conditions, thermal barriers help maintain consistent indoor temperatures. They prevent hot spots from forming near spray foam insulation. This creates better comfort throughout your home.
Fire Protection Benefits:
- Delays ignition of foam insulation
- Reduces flame spread rates
- Prevents toxic gas release
- Maintains structural integrity longer
The barrier must remain intact for at least 15 minutes during fire exposure. This meets most building code requirements for residential construction.
Common materials used in residential thermal barriers
We use several proven materials for residential thermal barriers. Gypsum wallboard (drywall) is the most common choice. It's affordable and meets fire resistance standards when properly installed.
Popular Thermal Barrier Materials:
- ½-inch gypsum wallboard - Most cost-effective option
- Intumescent coatings - Applied directly to foam surface
- Fiber cement boards - Higher durability in wet areas
- Specialized fire-resistant panels - Premium protection
Intumescent coatings expand when heated, creating a protective char layer. They work well in tight spaces where drywall installation is difficult.
Each material has specific installation requirements. We must follow manufacturer guidelines exactly to maintain fire protection. The choice depends on your budget, space constraints, and local building codes.
Understanding the 15-minute thermal barrier rule
The 15-minute thermal barrier rule requires specific materials to protect foam insulation from fire exposure for at least 15 minutes. Building codes mandate this protection in most interior spaces, though requirements vary between fiberglass and spray foam installations.
What the 15-minute fire rating actually means
The 15-minute fire rating measures how long a material can protect foam insulation before it reaches 250 degrees Fahrenheit. This temperature limit prevents the foam from igniting or releasing toxic gases.
During testing, engineers expose the barrier material to fire conditions. The barrier must keep the foam surface below 250 degrees for a full 15 minutes.
Why 15 minutes matters:
- Gives occupants time to exit safely
- Prevents rapid flame spread
- Reduces toxic gas release
- Meets minimum safety standards
Standard testing follows ASTM E119 or NFPA 275 protocols. These tests simulate real fire conditions in buildings.
The NAIMA building code mandates that exposed spray polyurethane foam insulation must be covered with an approved thermal barrier—typically ½‑inch gypsum wallboard, to delay foam ignition and comply with the 15‑minute thermal barrier rule in habitable spaces.
Where it's required under code—and where it's not
Building codes require thermal barriers in most interior spaces where foam insulation is installed. The International Building Code (IBC) sets these standards nationwide.
Required locations include:
- Living rooms and bedrooms
- Kitchens and bathrooms
- Hallways and stairwells
- Basements with occupancy
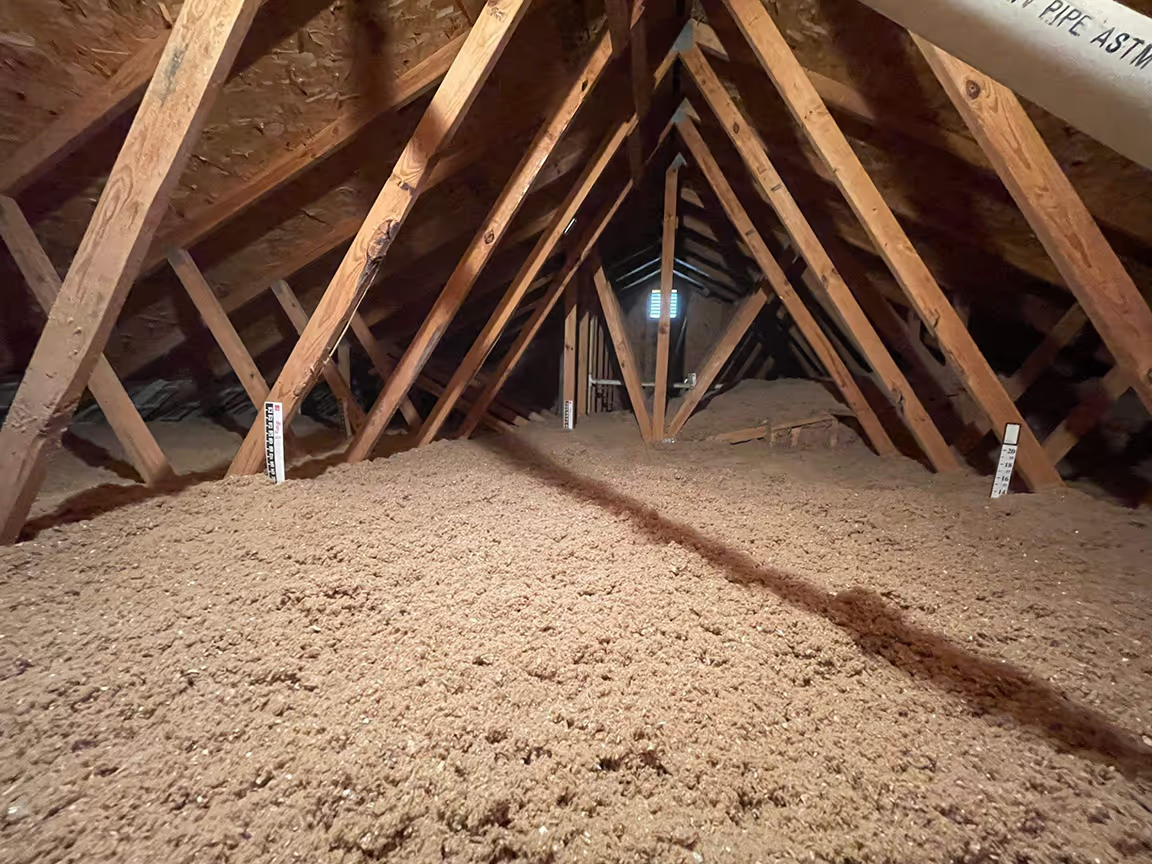
- Attics with access
Common exceptions:
- Crawl spaces without access
- Rim joists in basements
- Exterior wall cavities
- Some roofing applications
Local building officials determine specific requirements for each project. We recommend checking with your local code office before installation.
Some areas allow alternative barriers beyond standard drywall. These might include specialized coatings or fire-rated panels.
Applying the rule to fiberglass and spray foam
Fiberglass insulation typically doesn't require thermal barriers because it's non-combustible. The glass fibers won't ignite or spread flames like foam materials.
Fiberglass characteristics:
- Non-combustible material
- No thermal barrier needed
- Can be left exposed in many areas
- Minimal fire safety concerns
Spray foam insulation always requires thermal barriers in occupied spaces. This foam plastic material is combustible and can spread flames rapidly.
Spray foam requirements:
- Must have 15-minute thermal barrier
- Cannot remain exposed indoors
- Requires building code approval
- Needs proper installation certification
Closed-cell and open-cell spray foam both need thermal barriers. The type of foam doesn't change this requirement.
We see many homeowners surprised by these different rules. Planning for thermal barriers early prevents costly changes during construction.
According to the International Residential Code (IRC), foam plastic insulation in rim joists may remain exposed without a 15‑minute barrier only in uninhabited areas like basements or crawl spaces; all other interior living spaces require full thermal barrier protection.
Choosing the right thermal barrier for your insulation type
Different insulation materials require specific thermal barrier approaches to meet safety codes and maximize performance. The type of insulation you choose directly impacts which thermal barrier will work best for your project.
Best barriers for fiberglass insulation
Fiberglass insulation typically works well with standard drywall as a thermal barrier. This combination meets most building codes for fire safety.
Standard drywall options include:
- 1/2-inch gypsum board (most common)
- 5/8-inch gypsum board (better fire resistance)
- Type X fire-rated drywall (required in some areas)
We recommend checking local building codes before installation. Some areas require specific drywall thickness or fire ratings.
Fiberglass doesn't need specialized thermal barriers like spray foam does. The material itself is non-combustible and works safely with basic drywall protection.
Installation tips:
- Ensure proper drywall sealing at joints
- Use appropriate fasteners for your wall type
- Install vapor barriers as needed for your climate
Spray foam and the need for thermal layering
Spray foam insulation requires more careful thermal barrier selection due to its combustible nature. We must create proper thermal layering to meet fire safety requirements.
Required thermal barriers for spray foam:
- Minimum 1/2-inch gypsum board
- Specialty intumescent coatings
- Fiber cement board in some applications
The R-value performance depends on proper thermal layering. Without correct barriers, spray foam can pose fire risks and fail building inspections.
Key considerations:
- Spray foam expands and can push against barriers
- Professional installation ensures proper barrier placement
- Some spray foam types need thicker barriers than others
We strongly recommend professional installation for spray foam projects. The thermal barrier must be installed correctly to maintain the insulation's effectiveness and safety.
When an insulated barrier isn't enough
Some situations require additional protection beyond standard thermal barriers. High-heat areas and specific building codes may demand extra measures.
Situations requiring enhanced protection:
- Basements with heating equipment nearby
- Attics with recessed lighting
- Areas exposed to extreme temperature changes
Insulated barriers alone may not provide adequate protection in these cases. We might need to combine multiple barrier types or use specialized materials.
Enhanced protection options:
- Double-layer drywall systems
- Mineral wool backing behind standard barriers
- Metal thermal breaks in specific applications
Consider professional evaluation for complex installations. Building inspectors often require detailed plans for non-standard thermal barrier applications.
Benefits and limitations of thermal barrier insulation
Thermal barrier insulation offers significant advantages in fire protection, temperature control, and energy efficiency, but it also comes with important limitations we need to consider. Understanding the differences between radiant barriers and thermal barriers helps us make informed decisions for our homes.
Fire protection, temperature control, and energy savings
Thermal barrier insulation provides crucial fire protection by slowing down heat transfer during fires. This gives us more time to evacuate safely and can reduce property damage.
For temperature control, thermal barriers create consistent indoor temperatures year-round. We stay warmer in winter and cooler in summer without overworking our heating and cooling systems.
Energy savings represent the biggest long-term benefit. Thermal barriers reduce heat transfer through walls, roofs, and floors by up to 30%. This translates to lower monthly utility bills.
The R-value determines how effective our thermal barrier will be. Higher R-values mean better insulation performance and greater energy savings over time.
Most homeowners see a return on investment within 2-5 years through reduced energy costs. We also reduce greenhouse gas emissions by using less energy for heating and cooling.
Disadvantages to consider before committing
Initial cost can be high, especially for whole-house installations. Professional installation often costs $2,000-$8,000 depending on home size and material type.
Some thermal barriers lose effectiveness over time. We need regular inspections and potential replacement every 10-20 years depending on the material.
Installation complexity requires skilled professionals for proper performance. Poor installation creates gaps that reduce effectiveness and waste our investment.
Certain materials like spray foam can trap moisture if not installed correctly. This leads to mold problems and structural damage in our walls.
Space requirements can be significant. Thick thermal barriers reduce interior room dimensions, which matters in smaller homes.
Radiant barriers vs. thermal barriers: Key differences
Radiant barriers reflect heat away from surfaces using reflective foil materials. They work best in hot climates where cooling costs are our main concern.
Thermal barriers slow heat transfer through materials using insulation properties. They provide year-round benefits in all climate zones.
Feature
Radiant Barriers
Thermal Barriers
Best climate
Hot, sunny areas
All climates
Primary benefit
Cooling cost reduction
Heating and cooling
Installation cost
Lower
Higher
Effectiveness
Summer focused
Year-round
We can combine both types for maximum efficiency. Radiant barriers work well in attics while thermal barriers protect walls and floors.
The choice depends on our climate, budget, and energy goals. Cold climates benefit more from thermal barriers, while hot climates see bigger gains from radiant barriers.
Installation insights: What to expect from a professional job
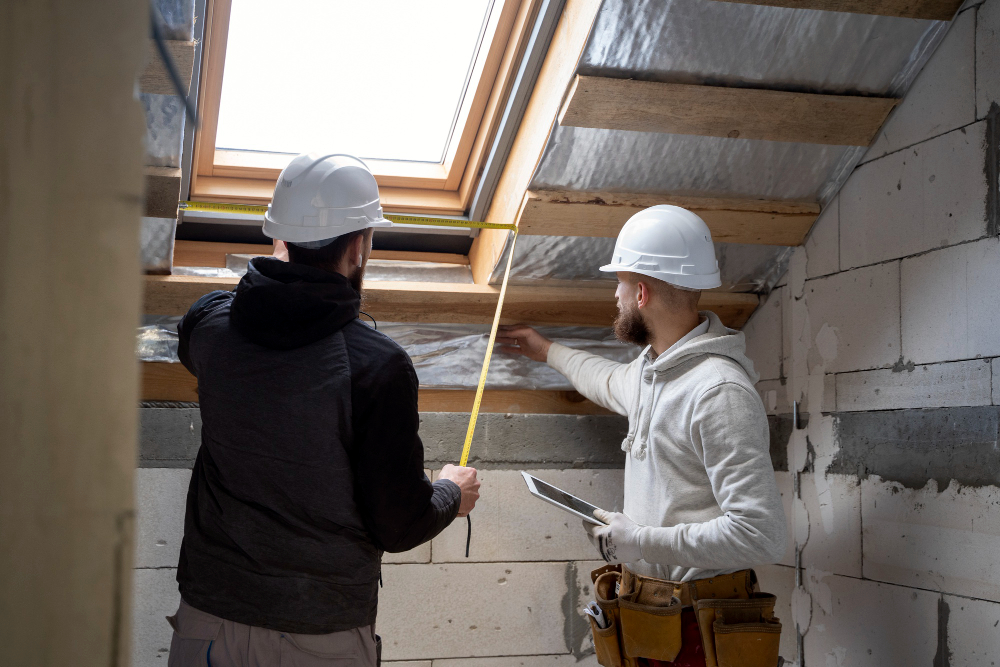
Professional thermal barrier installation requires specific skills and knowledge that most homeowners lack. The process involves precise techniques, code compliance, and significant time commitments that make professional installation the better choice.
How contractors install thermal barriers correctly
Professional contractors follow a systematic approach when installing thermal barriers. They start with a thorough inspection of your home's structure and existing insulation.
The installation process includes:
- Air sealing gaps and cracks before installation
- Measuring and cutting materials to exact specifications
- Installing vapor barriers in the correct direction
- Ensuring proper ventilation gaps remain intact
Contractors use specialized tools like pneumatic staplers and infrared cameras. These tools help them achieve consistent coverage and identify problem areas we might miss.
Proper installation techniques prevent common issues:
- Thermal bridging through studs and joists
- Moisture problems from incorrect vapor barrier placement
- Gaps that reduce insulation effectiveness
Professional installers know how to work around electrical wiring and plumbing safely. They also understand which materials work best in different areas of your home.
Costs, timeframes, and building code compliance
Professional thermal barrier installation typically costs between $1.50 to $3.50 per square foot. This price includes materials, labor, and proper disposal of old insulation.
Cost factors include:
- Home size and complexity
- Type of thermal barrier material
- Accessibility of installation areas
- Local labor rates
Most residential installations take 1-3 days to complete. Attic installations are faster than wall installations, which may require removing drywall.
Building code compliance is crucial. Contractors understand local requirements for:
- R-value minimums for different climate zones
- Fire safety ratings for materials
- Vapor barrier requirements
- Ventilation maintenance standards
Professional installers pull permits when required. They also arrange inspections to ensure code compliance before finishing the job.
Why DIY thermal barrier installation is rarely worth it
DIY thermal barrier installation seems cost-effective but creates significant risks. Most homeowners lack the knowledge to install these systems correctly.
Common DIY mistakes include:
- Installing vapor barriers backwards
- Compressing insulation and reducing effectiveness
- Creating gaps that allow air leakage
- Blocking ventilation pathways
Safety concerns make DIY installation dangerous. Thermal barrier materials can cause skin irritation and respiratory problems without proper protective equipment.
Professional installation saves money long-term. Contractors install systems that last 15-20 years without performance issues. DIY installations often need repairs or replacement within 5-7 years.
Time investment is another factor. Professional crews complete installations in days while DIY projects can take weeks. This extended timeline increases the risk of weather damage during installation.
Conclusion
Thermal barrier insulation is one of the most effective ways we can improve our homes' energy efficiency. The right materials and proper installation work together to create lasting benefits.
We need to focus on three main factors for success. First, choosing the right R-value for our climate zone. Second, selecting quality materials that fit our specific needs. Third, ensuring proper installation without gaps or compression.
The upfront investment in quality thermal barrier insulation pays off through reduced energy costs. Most homeowners see significant savings within the first few years.
We should also consider our long-term plans. Quality insulation lasts decades when installed correctly. This makes it a smart investment for both current comfort and future home value.
Before starting any project, we recommend getting quotes from licensed contractors. They can assess our specific needs and recommend the best solutions for our budget and goals.
Taking action now means we start saving money and improving comfort right away.
Schedule a consultation today to ensure your insulation meets thermal barrier code requirements and keeps your home safe and efficient.